How to Accept USDT, USDC, BTC & ETH in Node.js — 10-Minute Binance Payment Gateway (No Merchant Account Needed)
Looking for a fast and free way to accept crypto payments in your Node.js app? This guide shows you how to integrate Binance QR code payments and popular cryptocurrencies like USDT, BTC, ETH, and USDC directly into your Node.js application — in under 10 minutes, with no Binance Merchant account required.
What Is the PayerURL Node.js Crypto Payment Gateway?
The PayerURL Binance and Crypto Payment Gateway is a free, open-source solution for Node.js developers who want to accept cryptocurrency payments directly into their own wallets. There is no middleman, no third-party holding your funds, and no complex setup.
Whether you run an e-commerce store, a SaaS platform, or a freelance service — this package lets you get paid in crypto instantly and securely.
Why Use PayerURL for Crypto Payments in Node.js?
Most crypto payment solutions require you to open a special merchant account, go through KYC, or give up control of your funds. PayerURL is different.
Here is why thousands of developers choose PayerURL:
- ✅ No Binance Merchant Account Required — A regular personal Binance account is all you need
- ✅ Direct-to-Wallet Settlement — Funds go straight to your wallet the moment payment is confirmed
- ✅ Supports 169+ Fiat Currencies — USD, EUR, GBP, CAD, BDT, and more with live exchange rates
- ✅ Multi-Chain Support — USDT (TRC20, ERC20, BEP20), USDC, BTC, ETH ERC20
- ✅ No KYC for Basic Accounts — Start accepting crypto without identity verification
- ✅ 100% Free & Open Source — No hidden fees, no monthly costs
- ✅ 10-Minute Integration — Built for Express.js with a simple, clean API
- ✅ 24/7 Telegram Support — Get help any time at t.me/Payerurl
Supported Cryptocurrency Payment Methods
This package supports the most widely used crypto networks today:
| 🟡 Binance QR Code | Personal Binance Account |
| 💵 USDT | TRC20, ERC20, BEP20 |
| 💲 USDC | BEP20, ERC20 |
| ₿ Bitcoin (BTC) | Bitcoin Network |
| Ξ Ethereum (ETH) | ERC20 |
How the Payment Process Works
The integration follows a simple and secure 5-step flow:
- Collect user and order details on your platform
- Sign the payment request using HMAC SHA256 for security
- POST the request to the PayerURL API and receive a redirect URL
- Redirect the customer to the PayerURL hosted payment page
- Receive the payment result:
- ✅ Customer is sent to your
redirect_toURL on success - 🔔 Your server gets a callback at
notify_urlwith full transaction details - ❌ Customer is returned to
cancel_urlif they cancel
- ✅ Customer is sent to your
Once payment is confirmed, funds credit to your wallet instantly. Your order status updates automatically through the API callback.
How to Integrate PayerURL in Your Node.js App
Step 1 — Get Your API Keys
Sign up and get your free API keys from the PayerURL dashboard: 👉 https://dash.payerurl.com
Step 2 — Set Up Express.js
If you haven’t already, set up a basic Express.js application: 👉 https://expressjs.com
Step 3 — Build the Payment Request Object
const paymentRequest = {
  order_id: 1922658446,       // Must be unique per order
  amount: 123,
  items: [
    {
      name: "Order item name",
      qty: "1",
      price: "123",
    },
  ],
  currency: "usd",
  billing_fname: "Mohi Uddin",
  billing_lname: "Mahim",
  billing_email: "[email protected]",
  redirect_to: "http://localhost:3000/success",
  notify_url: "http://localhost:4000/response",
  cancel_url: "http://localhost:3000/cancel",
  type: "php",
};
⚠️ Make sure
order_idis unique for every transaction.
Step 4 — Sign the Request with HMAC SHA256
// Sort object keys alphabetically
const sortedArgsKeys = {};
Object.keys(paymentRequest)
  .sort()
  .forEach((key) => {
    sortedArgsKeys[key] = paymentRequest[key];
  });

// Build query string
function buildQueryString(obj, prefix) {
  let queryString = [];
  for (const key in obj) {
    if (Object.prototype.hasOwnProperty.call(obj, key)) {
      const value = obj[key];
      const propName = prefix ? `${prefix}[${key}]` : key;
      if (value !== null && typeof value === "object") {
        queryString.push(buildQueryString(value, propName));
      } else {
        queryString.push(`${propName}=${encodeURIComponent(value)}`);
      }
    }
  }
  queryString = queryString.join("&");
  return new URLSearchParams(queryString).toString();
}

// Create HMAC SHA256 signature
const argsString = buildQueryString(sortedArgsKeys);
const signature = crypto
  .createHmac("sha256", securityKey)
  .update(argsString)
  .digest("hex");

// Encode auth string in base64
const authStr = btoa(`${publicKey}:${signature}`);
Step 5 — Send the API Request
const url = "https://test.payerurl.com/api/payment";

const response = await fetch(url, {
  method: "POST",
  headers: {
    "Content-Type": "application/x-www-form-urlencoded;charset=UTF-8",
    Authorization: `Bearer ${authStr}`,
  },
  body: argsString,
});

const reData = await response.json();

// Redirect user to the PayerURL payment page
if (reData && reData.redirectTO) {
  res.redirect(reData.redirectTO);
} else {
  res.status(500).json({ message: "Payment initiation failed." });
}
Step 6 — Handle the Payment Callback (Webhook)
// Decode the Authorization header from PayerURL
const authStr = req.get("Authorization");
let auth;

if (!authStr || !authStr.startsWith("Bearer ")) {
  const authStrPost = Buffer.from(req.body.authStr, "base64").toString("utf8");
  auth = authStrPost.split(":");
} else {
  const authStrDecoded = Buffer.from(
    authStr.replace("Bearer ", ""),
    "base64"
  ).toString("utf8");
  auth = authStrDecoded.split(":");
}

// Verify public key and process the payment result
if (payerurl_public_key !== auth[0]) {
  return res.status(200).json({ status: 2030, message: "Public key doesn't match" });
}

const GETDATA = {
  order_id: req.body.order_id,
  transaction_id: req.body.transaction_id,
  status_code: req.body.status_code,
  confirm_rcv_amnt: req.body.confirm_rcv_amnt,
  confirm_rcv_amnt_curr: req.body.confirm_rcv_amnt_curr,
  coin_rcv_amnt: req.body.coin_rcv_amnt,
  txn_time: req.body.txn_time,
};

if (!GETDATA.transaction_id) {
  return res.status(200).json({ status: 2050, message: "Transaction ID not found" });
} else if (GETDATA.status_code === 20000) {
  return res.status(200).json({ status: 20000, message: "Order Cancelled" });
} else if (GETDATA.status_code !== 200) {
  return res.status(200).json({ status: 2050, message: "Order not complete" });
}

// 🔥 Payment confirmed — add your business logic here
// Example: update order status to "paid" in your database

res.status(200).json({ status: 2040, message: GETDATA });
About PayerURL
PayerURL is a leading direct-to-wallet cryptocurrency payment processor. It allows merchants to receive payments from customers straight into their personal wallets — including USDT, BTC, ETH, and USDC — using live market exchange rates. No intermediary. No delays. Just instant crypto payments.
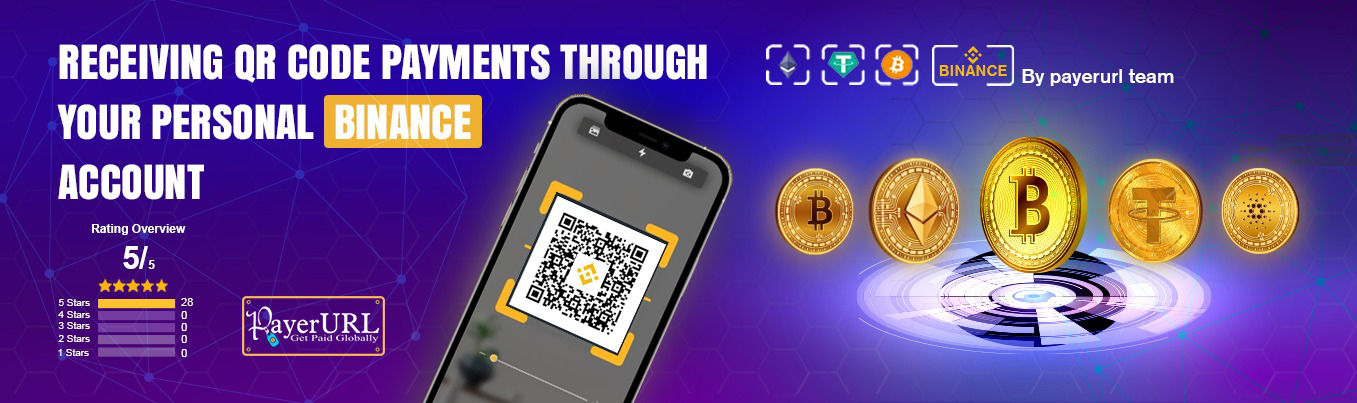
Screenshots
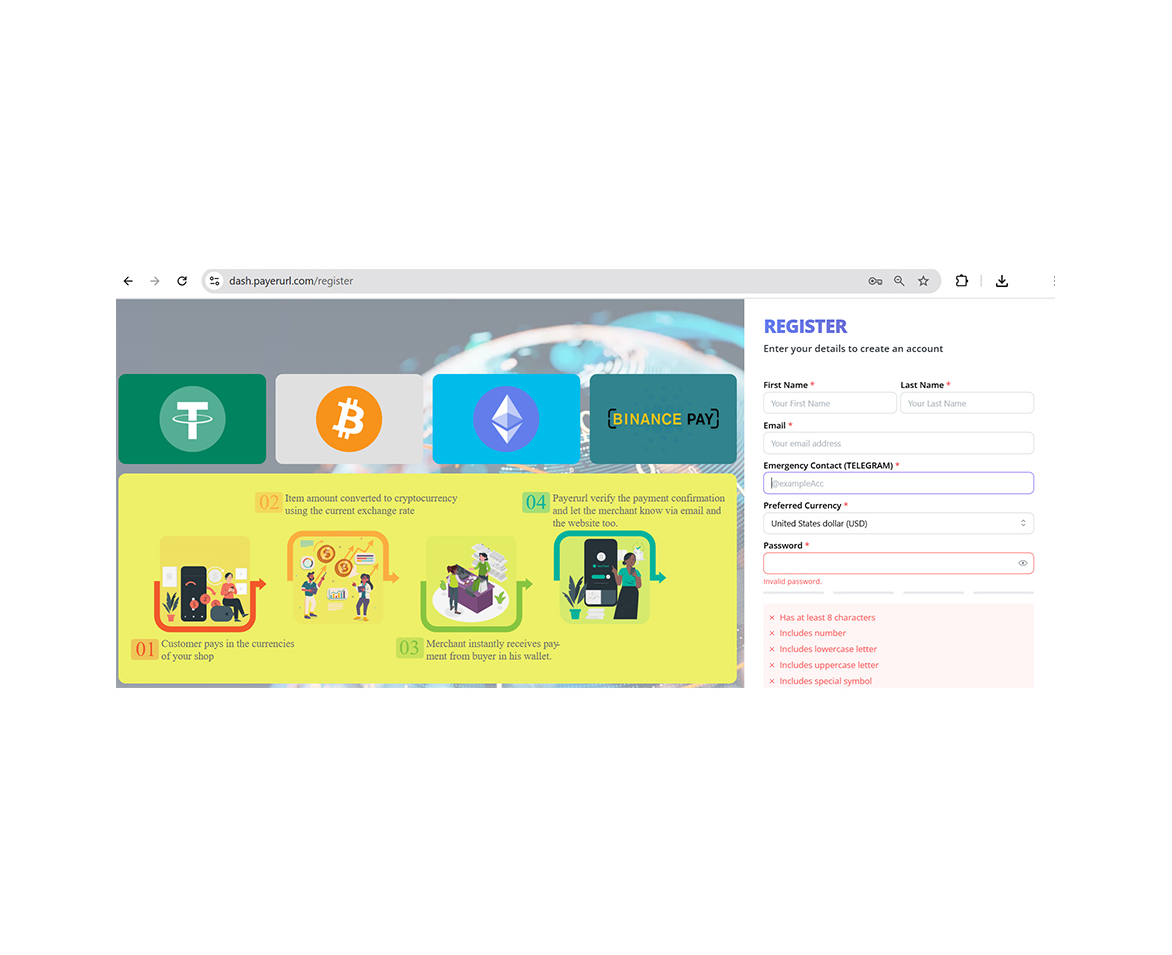
Create account
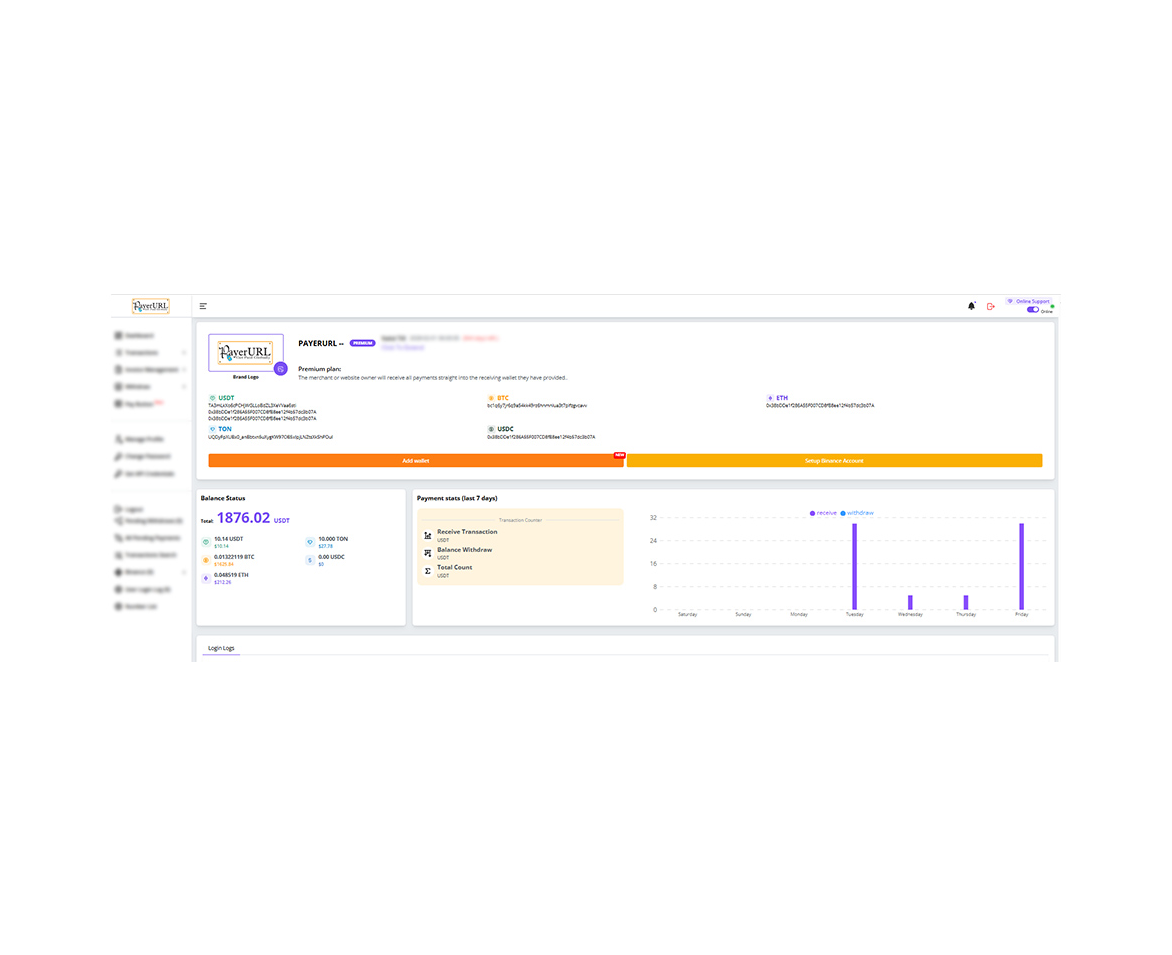
User dashboard
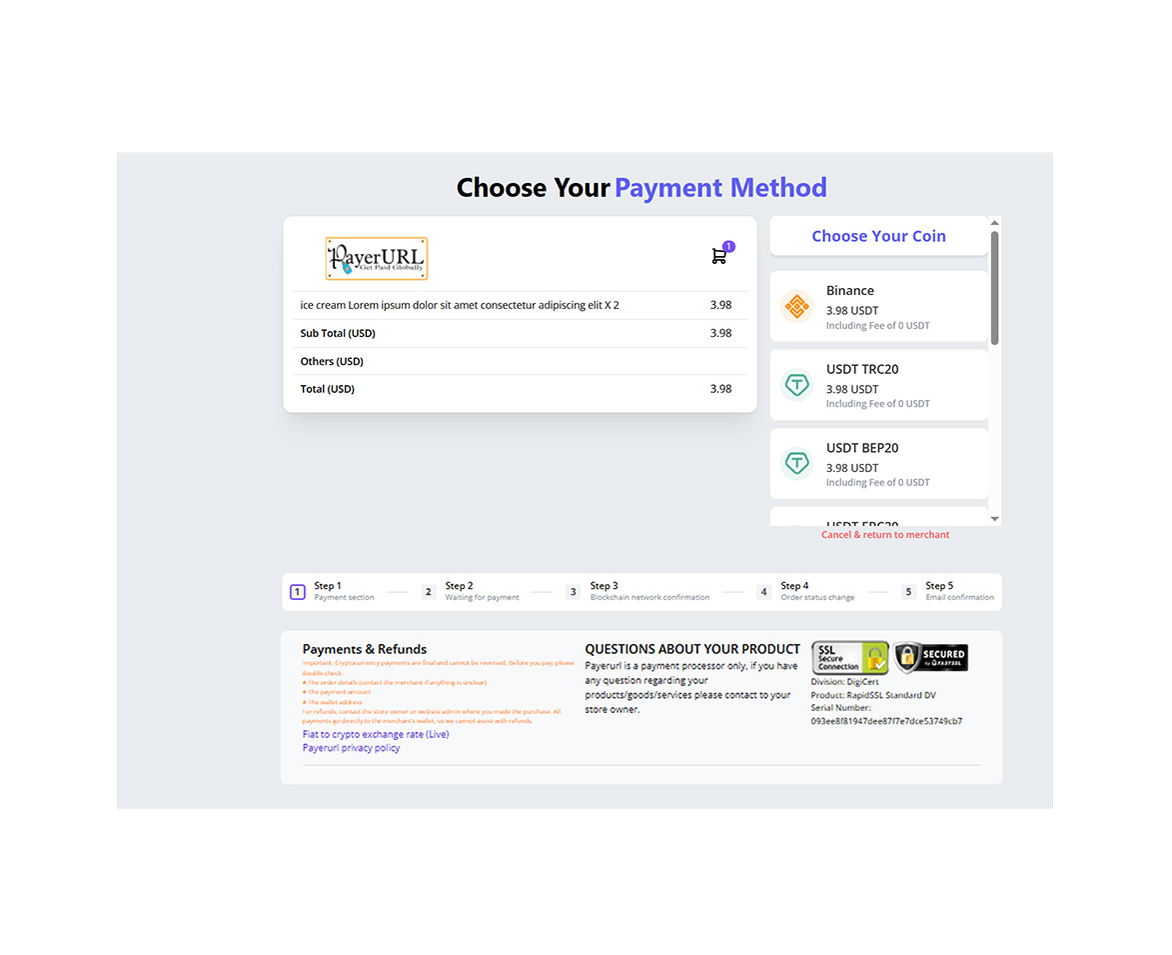
Payment checkout page
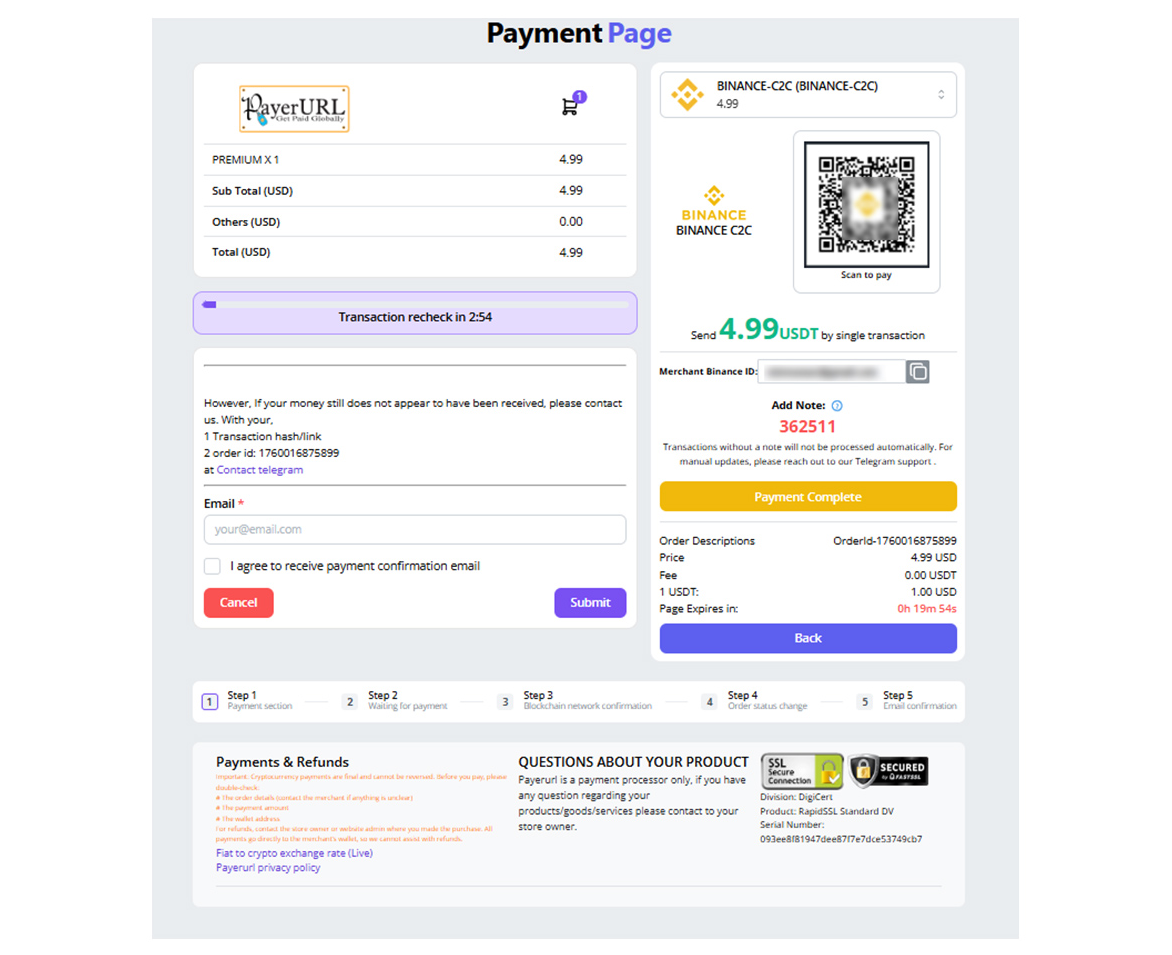
Binance payment page
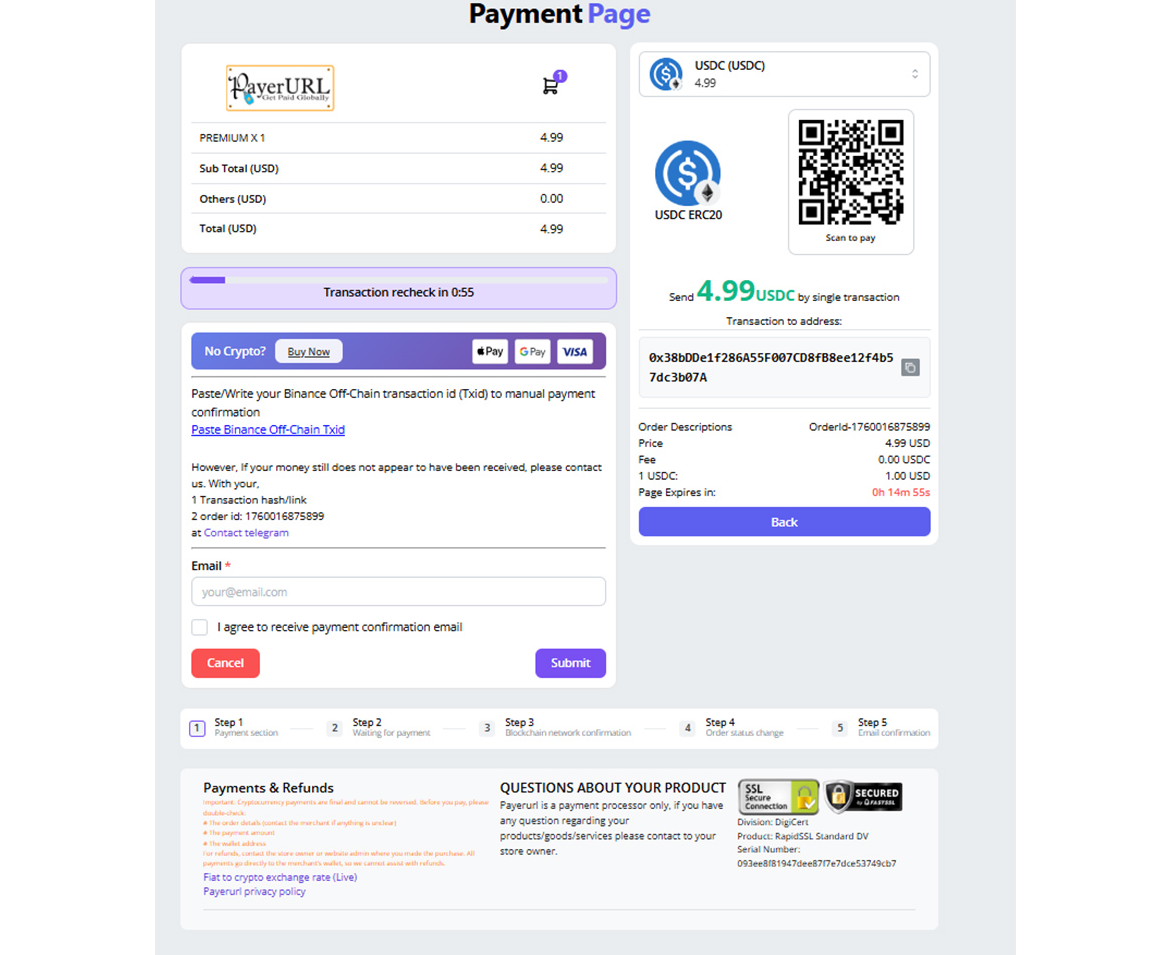
payment page screenshot
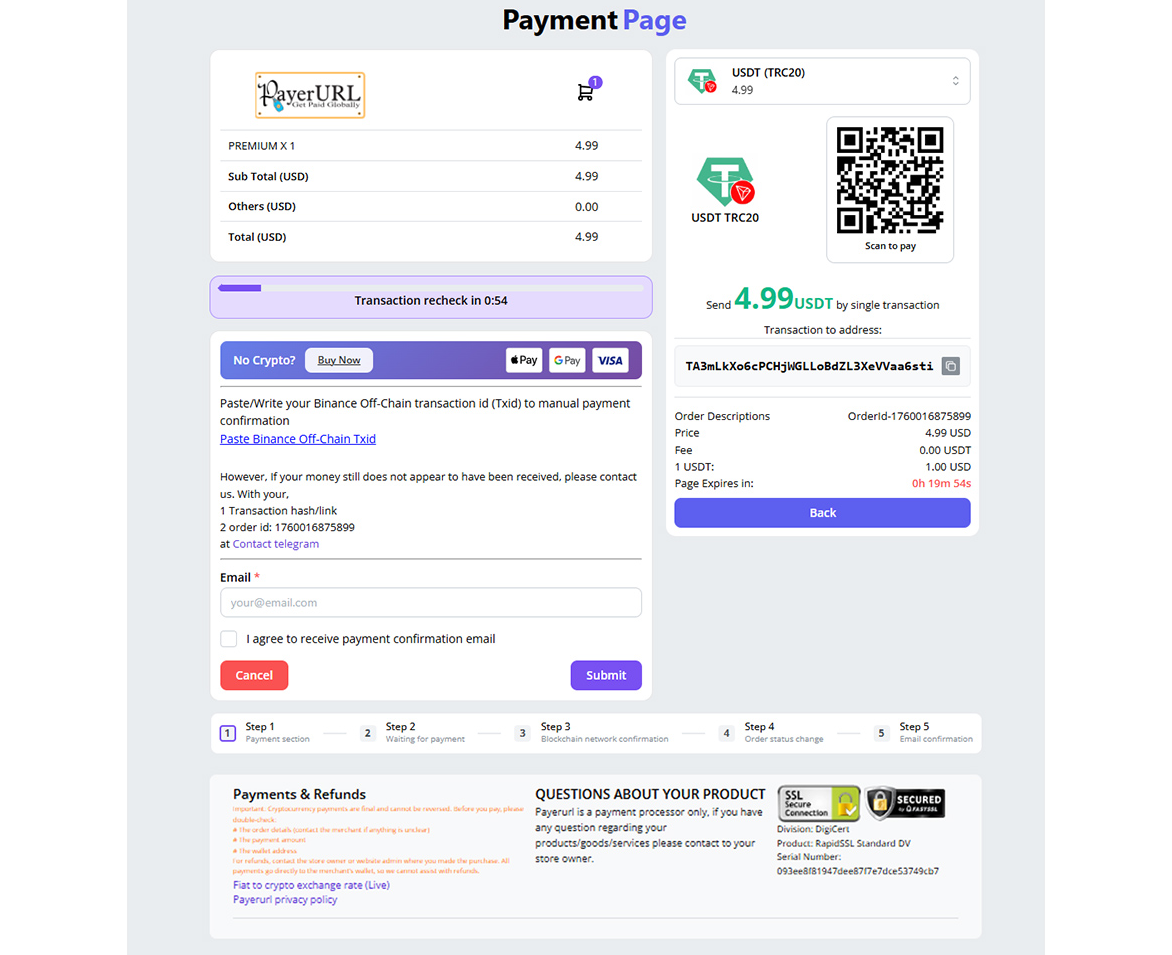
payment page screenshot
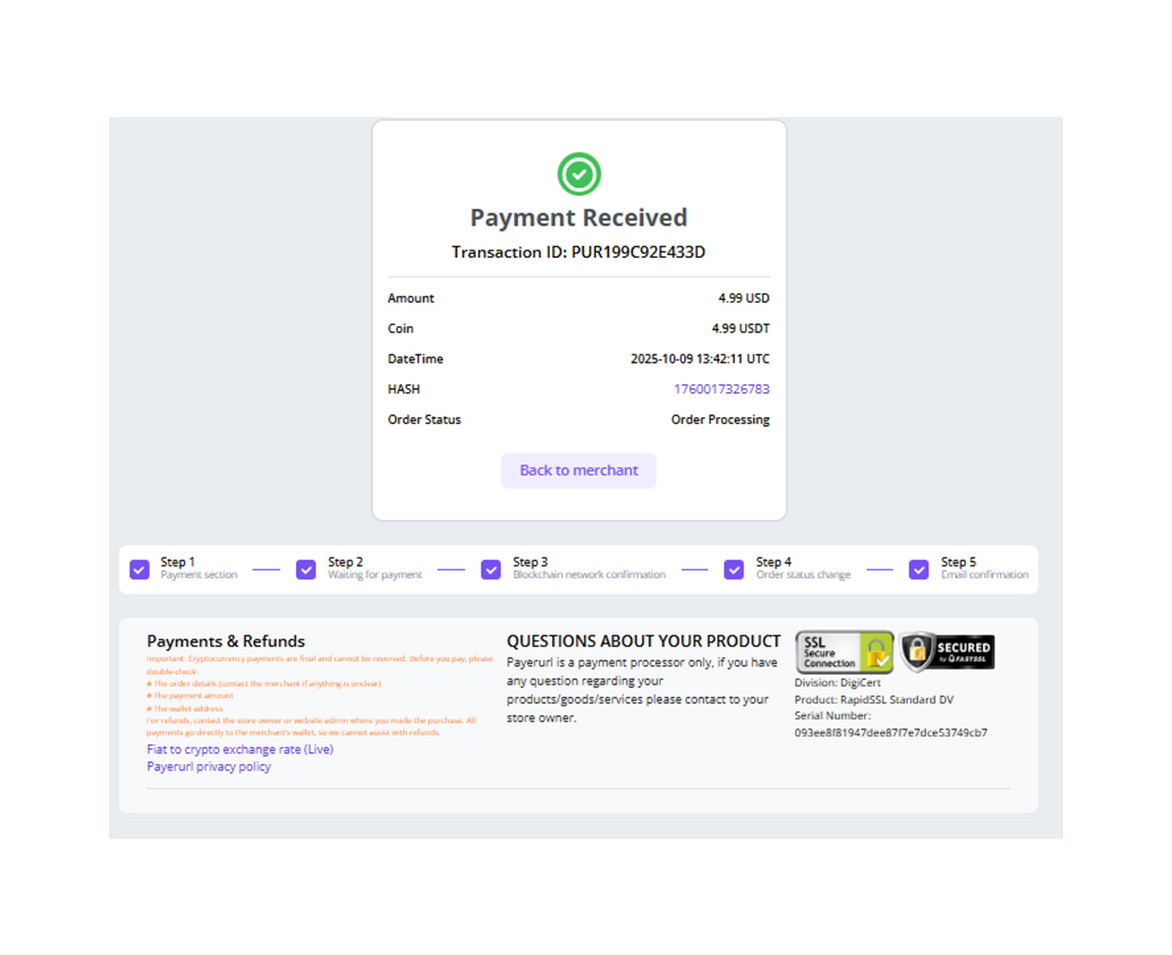
Payment confirmation
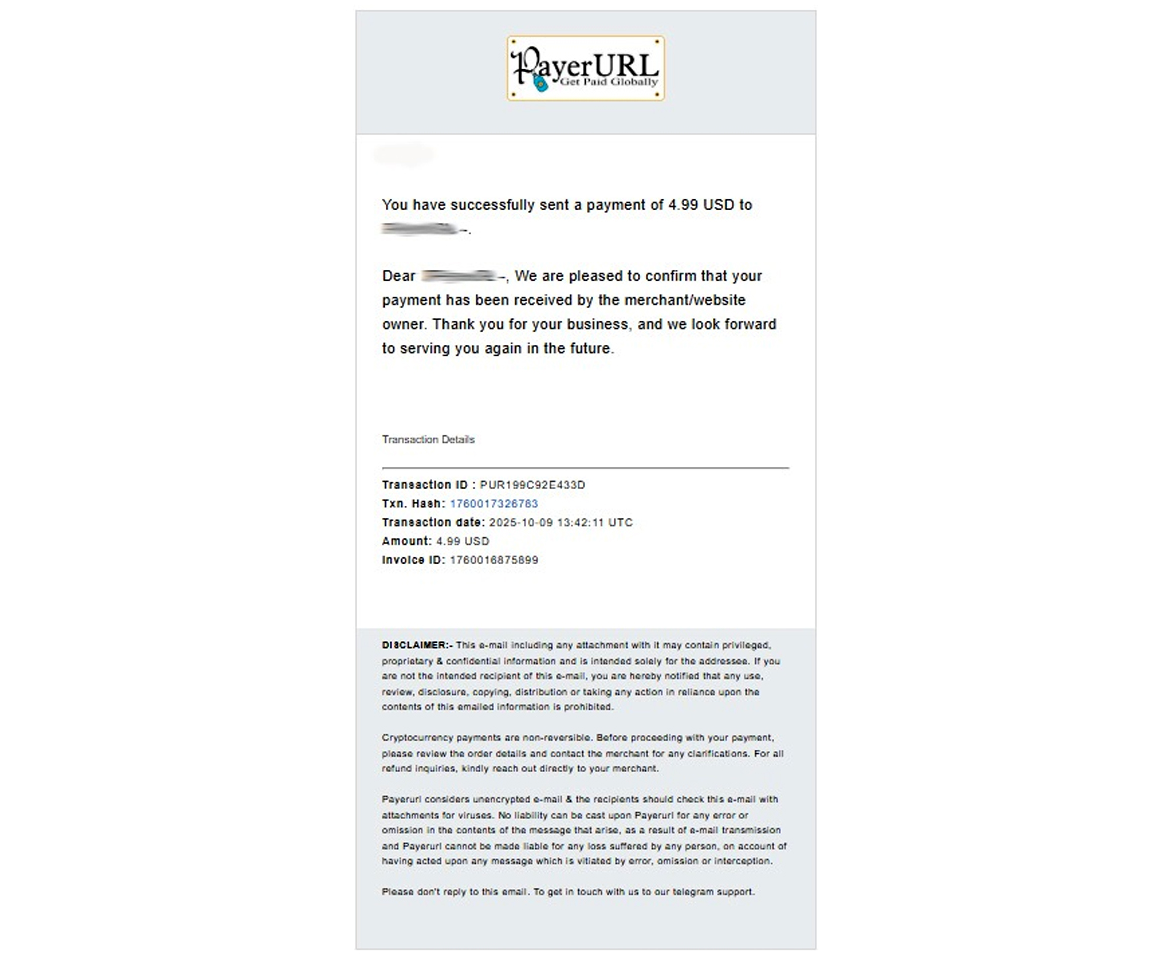
Payment confirmation email
Frequently Asked Questions
Do I need a Binance Merchant account? No. A regular personal Binance account is all you need to start accepting Binance QR code payments.
Is this package free? Yes. PayerURL’s Node.js integration is 100% free and open source under the MIT License.
Which cryptocurrencies are supported? USDT (TRC20, ERC20, BEP20), USDC (BEP20, ERC20), Bitcoin (BTC), and Ethereum (ETH ERC20).
Do I need KYC to use this? No KYC is required for basic accounts. You can start accepting crypto payments immediately.
How long does integration take? Most developers complete the full integration in under 10 minutes.
Get Started Today
| Resource | Link |
|---|---|
| 🔴 Live Demo | telegram.payerurl.com |
| 🔑 Get API Keys | dash.payerurl.com |
| 🌐 Website | payerurl.com |
| 📞 Telegram Support | t.me/Payerurl |
| [email protected] |
License
This package is open-sourced software licensed under the MIT License.